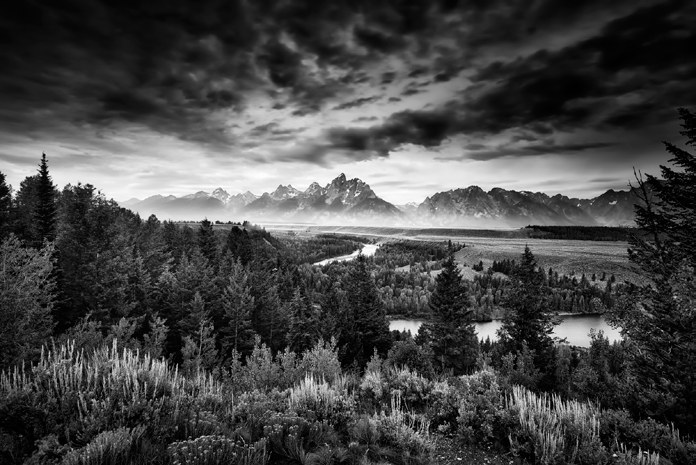
With the advent of digital technology and sophisticated built-in metering systems, many regard the Zone System as pioneered by landscape photography legend Ansel Adams, and portrait specialist Fred Archer between 1939 and 1940, as quaint, complicated, and completely superfluous. But are they correct, and can this system for nailing exposure be applied in today’s world, where technological brute force is brought to bear on a given capture, comparing against a database of literally thousands of images to determine its best rendering?
Well, they say you can’t teach an old dog new tricks; but can you teach a new dog old ones? Of course!
What’s it all About?
As with any medium that attempts to record information which normally passes ephemerally through our human sensory organs, be it sound, image, vibration, whatever… photography is subject to limitations in dynamic range. That is, in this case, the difference between the lowest luminance value the sensor wells can record versus the highest, as measured in exposure value (EV), otherwise known as stops. (E.g. the difference between f/2.8 and f/4, or f/4 and f/5.6 is one EV.)
At present, DSLRs fail to adequately replicate the palette of data available to our senses, at best yielding around 14 EV of dynamic range (comparable, if slightly lower in some cases, to that available via film), while the human eye is capable of seeing in the neighbourhood of 20 EV. This of course presents difficulties in accurately portraying a scene which encompasses the complete range of luminance values perceivable by our own sensory apparatus.
The Zone System was originally developed to address this problem throughout the entire photographic chain — from capture through print. It derives its name from the 11 discrete tonal regions designated 0 through X (using Roman numerals) the photographer uses to evaluate the scene he desires to capture and process. Zero (0) represents pure black, while X (10), corresponds to pure white or specular highlights. Though not precisely true, as the Adams designed Zones to correspond to density levels within a print, it is helpful to think of each step as being equivalent to one EV.
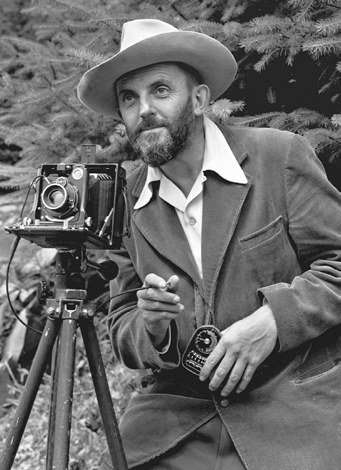
Here’s how the values relate to the real world according to Ansel Adams:
- Zone 0 — Pure Black
- I — Near black, with texture but no texture
- II — Textured black; the darkest part of the image in which slight detail is recorded
- III — Average dark materials and low values showing adequate texture
- IV — Average dark foliage, dark stone, or landscape shadows
- V — Middle grey: clear North sky; dark skin; average weathered wood
- VI — Average Caucasian skin; light snow; shadows on snow in sunlit landscapes
- VII — Very light skin; shadows in snow with acute side lighting
- VIII — Lightest tone with texture; textured snow
- IX — Slight tone without texture; glaring snow
- X — Pure white: light sources and specular reflections
Ok, fine… so what do you use these zones for anyway? Well first off, you have to know what you’re shooting, what’s important within the scene, and, if its contents significantly exceed your camera’s dynamic range, what elements in which zones may be sacrificed in support of capturing its key essence should you only wish to employ a single exposure. This decision process is known as visualization, and forms the basis of making informed choices in advance of depressing the shutter release to ensure what you capture meets with your photographic objectives.
In order to apply this knowledge using the Zone System, you need three things: a spot meter, a camera capable of manual mode, and a willingness to learn.
In Practice
First off, while it’s best to have a hand-held spot meter (ideally one that provides measurements in EV), you can get away with using the one in your camera if you don’t have one. For the simplest application of the Zone System, look for the brightest area in your scene that needs to have detail in it — let’s say some water cascading over a waterfall — now spot meter for that area. If you are using your camera’s spot, you may have to use a telephoto lens to ensure the area metered is of one consistent tonality. Ok, so according to our chart, this area should be in Zone VIII, though, depending on your camera’s dynamic range, this could very well be Zone VII, and it is often safer to select this to ensure your highlights aren’t blown and detail is preserved. Further, it is often difficult to print detail from this zone should you wish to do so. Many cameras and printers have a usable textural range of between Zones III and VII, though this is increasing every year. Experimentation with your equipment will yield the information you need to make an informed decision.
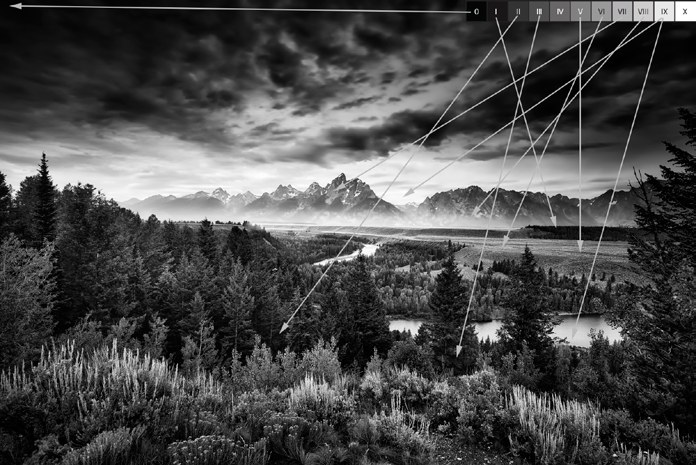
Understanding that a spot meter measures middle grey (18%), or Zone V, let’s play it safe and increase our EV by two stops to Zone VII, by either increasing our aperture or lowering our shutter speed. For example let’s say our meter tells us that at f/8, our shutter speed should be 1/250th. We can either open our lens up to f/4, or decrease our shutter speed to 1/60th. Of course, this depends on your knowing what the full stop increments are to begin with. As a refresher, in terms of aperture they are: f/1, f/1.4, f/2, f/2.8, f/4, f/5.6, f/8, f/11, f/16, f/22 etc. As far as shutter speed goes, remember: as at f/1, EV 0 is 1 second, EV 1 is 1/2, EV 2 is 1/4, EV 3 is 1/8th and so on, halving in time every stop… while in the opposite direction EV -1 is 2 seconds, EV -2 is 4 seconds etc., doubling in value every stop down to EV -6 at one minute. Many cameras feature shutter speeds in 1/3 stop increments, so that makes things easier to remember should you have difficulty.
Let’s say we are shooting a portrait of someone with light skin. We know from our table that this should fall within Zone VI… as our spot meter shows us the appropriate value for a Zone V face, we increase our EV by 1 stop. If we on the other hand wanted to place more importance on the shadowed areas within the composition, we might make a different exposure decision entirely.
Should your scene include elements you wish to include from both ends of the dynamic range scale, you may well opt to shoot multiple exposures and combine them manually in Photoshop, having specifically selected which Zone you wish each to be rendered in — foregoing HDR’s complex algorithms, artificial looking results, and often mushy midtones, opting instead for complete control.
The Zone System is all about knowing what you want, and not leaving exposure to chance or the whims of built-in metering to achieve your goals. It definitely takes a little practice, but we’re certain the results speak for themselves. So why not make the shift to manual? Do you know a professional driver that sits behind the wheel of an automatic on the track? We didn’t think so.