While the ubiquity of software based image editing tools — both on the desktop and in our mobile phones — one might be forgiven for thinking the best time to apply a filter is in post; and indeed, many believe that’s their only choice. However, often your best course of action is to employ a hardware filter at the point of capture, and your options here are nearly as numerous as those available in the software realm. Yet, while this is certainly the case, there are only a few key filters a photographer definitely needs to add to his kit…
But First
Before we get into a discussion regarding which filters you need, let’s cover one you likely don’t: the UV. A favourite add-on item of photographic equipment vendors everywhere, the UV, or Ultraviolet filter, is definitely better at padding their pockets than providing any utility to photographers. They’ll caution you strongly as to the dangers of leaving your expensive new lens unprotected, and nudge one of these babies on you whenever you let your guard down, admonishing you to leave it permanently affixed. Let’s explore this notion, shall we?
First, why on earth would you want to put some cheap piece of glass in front of your expensive lens elements? Not only will it degrade your picture quality, potentially be the source of vignetting, flare, and colour casts, but can also on occasion cause reflections to appear in your images. So you’re going to be happy with crappier photos for the sake of protecting your lens? Why did you buy an expensive lens in the first place?! But hey, maybe you’re one of those folks that still retains the plastic on their sofa…
If you want to protect your lens, buy insurance and use a hood, which is not only helpful in warding off objects that might interact with your front element, but improves contrast and reduces flare. Further, UV filters are really only effective when using film, as digital sensors aren’t particularly sensitive to ultraviolet rays. The only time you really might want to use one of these (or a cheaper ‘protect’ clear/glass filter), would be if you were shooting in an extreme environment such as the desert on a windy day. Don’t find yourself there often? Don’t bother with a UV filter.
Notes on Use
Just a couple of pointers before you get started with filters are in order. First, when affixing one to your lens, ensure there is no grit on the threads of either device. Clean gear can last a lifetime, while just a little carelessness can cost you a great deal of money. When using filters that come with adjustable front elements, ensure you are turning them in the same direction as you tighten on your lens in the first place. You may be in for a rude awakening indeed should you ignore this advice, as they can easily come off otherwise — and the last thing you need is a smashed or lost filter. Further, when attaching a filter or adjusting its element, you may discover you have inadvertently altered your focal length. A good practice to prevent this is to keep a finger on your room ring while adjusting the filter with your other hand. Finally, sometimes filter effects can be quite subtle through the viewfinder, and it is often helpful to utilize the depth-of-field preview button to see its full impact.
Graduated ND
A boon to landscape photographers everywhere, the graduated neutral density filter is designed with a clear glass portion which gradually darkens to the point of its designation (e.g. 2 stop, 3 stop etc). This is extremely useful in darkening skies in a scene wherein the EV range exceeds the camera’s dynamic range (quite common with DSLRs when used outside), requiring the photographer to make a decision as to which end of the spectrum to capture, while allowing the other to form either an overexposed or underexposed mess. The graduated ND filter darkens the brighter portion of the scene, enabling capture of all elements within it — something that cannot be done after the fact with levels adjustments in software.
Neutral Density
Finally, though not as essential to everyone’s photographic needs, a straight neutral density filter simply reduces the overall light from a scene by the amount of stops they are rated at. Particularly useful for long exposures, they enable the photographer to capture amazing images without risk of blowing out highlights. You’ll often see these implemented in support of rendering water’s motion as a silky smooth blur while the rest of the scene remains in sharp relief. Frequently of significantly higher stop reduction rating than their graduated counterparts (often as high as 10 stops!), straight NDs are certainly more specialized in nature, but an essential part of the dedicated landscape photographer’s kit. These filters may be used on their own, or indeed stacked with others, such as the graduated neutral density, to obtain the perfect capture.
Circular Polarizer
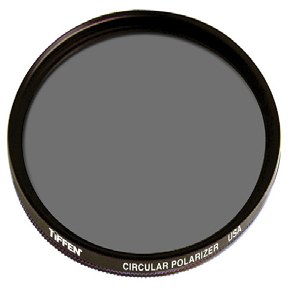
One of the most useful filters you can obtain has to be the circular polarizer. This add-on works by blocking the chaotic light bouncing around from reflective surfaces etc. and enables the photographer to achieve images which, without its application would be completely impossible. For example, should one wish to capture subjects beneath a body of water on a sunny day, you would find it extremely difficult due to the reflective properties of the water’s surface. Further, a circular polarizer is used to deepen blue skies, remove haze, add contrast, maximize saturation, and may be also used in a variety of other creative ways.
One thing to note however, you should ensure you pick up a circular polarizer rather than one of the linear variety (which, interestingly enough, the circular models also incorporate as an element of their manufacture), as, should you have a modern camera, you’ll likely experience autofocus issues with the application of the latter.
So how do you best employ this device? Well, when you are shooting at a situation that calls for its utilization, your polarizer will have its maximum impact should you position the filter at a 90 degree angle to the light source — typically the sun. Then rotate the outer ring until you see the desired effect in the viewfinder. Often the results can be quite dramatic, though you’ll want a bright viewfinder for this, as the effect can be subtle in some cases.
Ok, now with that out of the way, on with the show!