The world around us is resplendent in brilliant colour, tantalizing our eyes with sumptuous sights, just begging to be captured by the worthy photographer. Certainly we may understand that due to the historical limits of technology, at one time black and white was all that was available; but given the current state of affairs, why would anyone wish to dispense with nature’s lush palette, in favour of a monochromatic rendering of the world?
Subtlety is Sublime
The problem with colour, is that it overwhelms other valuable aspects of an image. Sometimes it’s the boorish jock, shouting in a hushed library, it’s the drunken socialite dispensing vitriol at a polite soiree, it’s the mobile phone ringing in church as your daughter exchanges her vows… it certainly gets your attention, but is not the most important part of the scene.
An example of the extreme power of colour to dominate, would be its use in advertising. We’re certain you’ve seen ads that use a predominately black and white image, yet employ a single small area of colour — which is immediately what the eye is drawn to. This is no accident; our eyes are designed to look for differences in their surroundings from an evolutionary perspective, as described in our article on visual tension in volume 2 of the magazine. However, when colour information is removed from a scene, our eyes act in exactly the same way, but reveal more subtle nuances that may indeed be more visually interesting than the distracting colour overlay.
Subject Matters?
The secret to great black and white photography is first, knowing what to shoot. You can’t just take a good colour photo, digitally convert it to greyscale, and call it a day… you have to shoot with black and white in mind. Certainly you may on occasion have a pleasant surprise upon attempting a black and white rendering of an existing shot, revealing hidden brilliance in what was an otherwise unremarkable colour image. However, excellence in black and white photography is not happenstance.
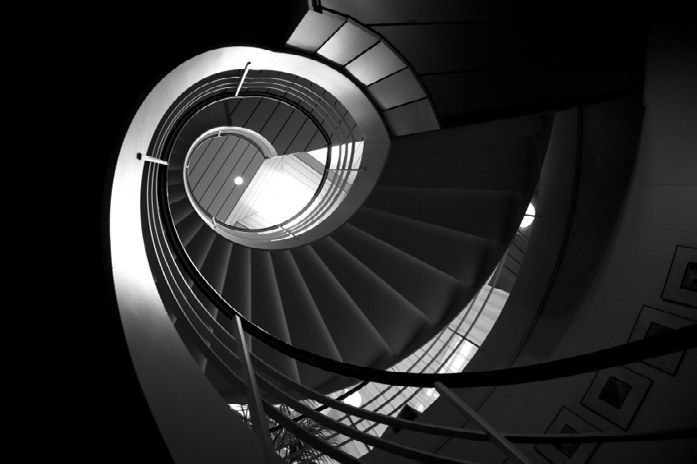
When colour is removed, shape and line become significantly more important. You need to train your eye to look for interesting combinations of shape exclusive of their overall context in the world. A photographer may for example wish to shoot an entire building when capturing in colour, while the black and white artist might see fascinating shapes within the contours of that same building which are best revealed in closeup.
Repeating forms and patterns are also highly beneficial to monochromatic imagery, as they add balance and unity to a photograph. The photographer needs to pay more attention to how these shapes are arrayed in-frame than they necessarily might in a colour image, as these details predominate. The implied line in how these objects are captured can also suggest motion where none exists, and provide additional interest to your subject matter.
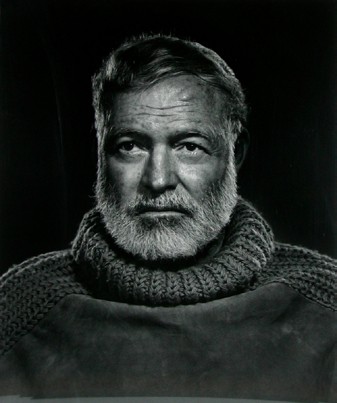
Further, texture is a key element to black and white photography. Take the famous shot of Ernest Hemingway by master photographer Yousuf Karsh for example: while it may well have worked in colour, the powerful textures in his face and sweater would be greatly diminished in importance, yielding a significantly less dramatic photograph.
Contrast is Crucial
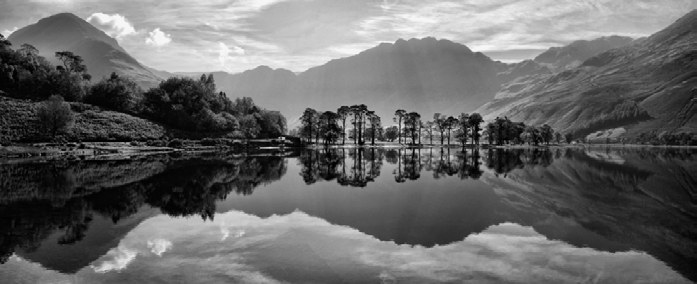
Given you are working with a single tone, the dynamic range expressed within an image gains significantly more prominence. Look for scenes that have a high degree of contrast within them in order to take advantage of this powerful compositional element when capturing an image. Though certainly you want to preserve as much detail as you can, black and white photography is significantly more forgiving in terms of blowing out highlights and blocking shadows. Often photographers intentionally allow highlights in the sky for example to be blown in favour of a more dramatic image by way of increased contrast ratio.
Depending on the subject matter, your shadows can often be more crucial than the highlights in terms of what you wish to preserve, with smooth tonal gradation in your darks to mids being the goal. This is of course often difficult to achieve, as your camera’s sensor records significantly less information at the lower end of the histogram than in its higher regions. As a result, photographers may wish to overexpose the highlights on capture, in order to shift the shadows to the right in the histogram… thereafter adjusting them back left in post, where they will contain more detail information as a result of the initial exposure decision.
Darkroom Decisions
So after taking the above into consideration, you’ve activated the shutter release and it’s time to send it to the printer, right? Certainly not. Even in the bad old days of messy chemicals and rosy illumination, great black and white prints required significant darkroom attention beyond the relatively straightforward development process. Take Ansel Adams for example, probably the best known landscape photographer of all time who worked exclusively in black and white. He’d spend countless hours in the darkroom dodging this, burning that… making sure every last detail was up to his demanding personal standards. The digital process, while less messy, can often be no less time consuming or exacting.
First off, in advance of your decision to process the image, you’ll want the widest possible latitude in your available options post — so shoot in RAW, in colour, and use the widest gamut available to you (normally Adobe RGB). Many cameras offer black and white modes; however, you’ll have a lot more flexibility by utilizing the power of your computer and RAW processor than your camera could reasonably expect to afford in terms of black and white conversion.
Once your image has been imported into Lightroom, Aperture, or whichever processor best suits your needs, you’ll want to start from a good base and work from there. I often select one of the black and white presets that ship with Lightroom, and then tweak the result to my satisfaction as an initial pass at the image. I’ll adjust the exposure to obtain the best results in order to highlight that which I am trying to convey, bump up the clarity, apply a fairly healthy manual contrast curve, adjust the HSL sliders to my liking, apply some basic sharpening, spot correction… and then it’s time to make the decision on whether it’s worthy of sending to the secondary processor!
Should I be pleased with my initial result, and determine the image is worth spending significant time on, I’ll elect to do one of two things: send the adjusted photo to Photoshop, or lately, open the original in onOne Software’s Perfect B&W for the royal treatment. What digital magic happens there you ask? Well we’re glad you did, as we are reviewing Perfect B&W within the pages of this very issue! Read on…
Finally
Anyone can shoot in black and white, but mastering the craft requires the photographer to change the way in which they normally perceive the world around them: paying more attention to detail, contrast, and nuance, and gaining an appreciation of the beauty of geometry and lines of implied motion. This perspective generally isn’t innate; so get out there and practice — you’ll have fun, and discover a whole new universe just waiting to be captured!