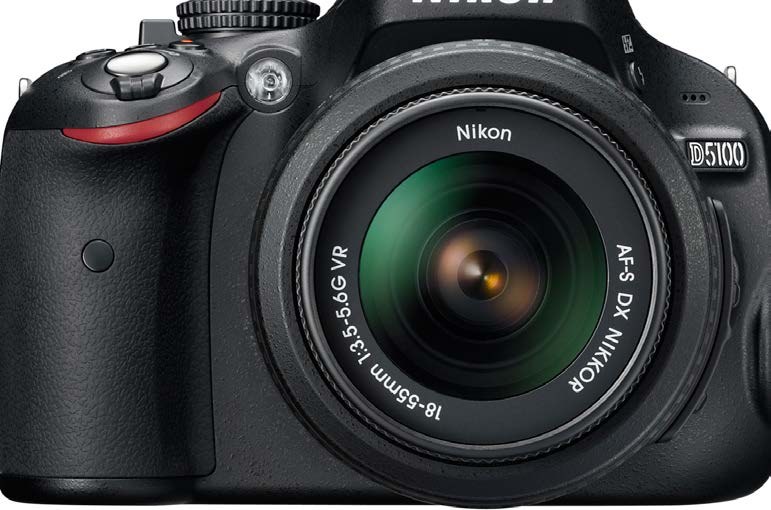
If you’ve come from the point-and-shoot world and have recently entered the realm of the single lens reflex with your new DSLR, there are several aspects of photography that up until this point, you’ve probably been blissfully unaware of the fact that the camera has been taking care of for you. While it’s certainly great to be able to see something and then capture that scene with relatively good fidelity and ease in the point-and-shoot arena, your options as far as creativity goes are seriously limited by that platform.
Most entry-level and intermediate DSLRs still offer newcomers a similar mode of shooting via the ‘auto’ setting in order to allow their owners to get some instant gratification while still getting their feet wet with their new gear. Unfortunately, this is also where a lot of people stop in their exploration — so in essence they’ve just purchased an expensive point-and-shoot with better optics. For many, the images they are now producing seem ‘good enough’, and going further doesn’t seem worth the effort of reading a tedious manual and actually educating themselves about the core principles of photography… what a waste.
If, on the other hand however, you are among those that want to get the most out of their photographic pursuits, and are interested in acquiring some basic knowledge which will pay large dividends down the road in terms of the quality of your images, read on.
Meet the Royals
While there are many factors that influence how any image is produced in-camera, by far the most important are what’s known as The Three Kings: aperture, shutter speed, and ISO (or similarly, ASA for you old fogies).
The first, and arguably the most important, is aperture. Simply put, aperture refers to the size of the opening in the lens which allows light to enter and project an image on your sensor for capture. The primary function of this setting is to control what’s known as depth of field. What’s that all about? Well, let’s say you were shooting a portrait of a person who was standing against a busy background. If you wanted to isolate that individual in order that they aren’t lost in the clutter, and to render that background as a pleasing out-of-focus backdrop, you’d use what’s known as a shallow depth of field. You’d set the aperture of your lens to a low numbered f stop in order to reduce the in-focus portion of your photo to, for example, only include the distance from the front of the person’s face to the back of their head.
Conversely, if you were shooting a landscape photo, you’d want maximum depth of field so that everything in the image was in focus. To that end, you’d select a relatively high numbered f stop. In fact, there’s a specific term which landscape photographers use to refer to the sweet spot where everything is in focus called the ‘hyperfocal distance’… but that’s a topic for another day.
F-Understood
Well, we’ve been talking a bit about f stops without really explaining them; so, let’s go over that now. If you look on your favourite lens, you’ll notice a series of numbers, some whole, some decimal, along the circumference of the barrel. On most lenses, these are actually located on a separate ring which you may adjust to set the value; though, on most modern cameras the actual setting of the aperture is done via software controls, requiring no physical manipulation of the ring. In this series of numbers, the smallest value represents the largest amount of light that the lens can let in; i.e. the maximum diameter of the lens blades when fully opened.
This sounds counter-intuitive at first, as you’d imagine the larger the number, the bigger the hole; however, when you consider the relationship to depth of field it makes more sense. Just think “Ok, if I want a larger portion of my image to be in focus, I need a greater depth of field — which means a higher f number.”
F stops start with the lowest number on your particular lens representing the maximum light they can let in, and each full stop thereafter a halving of that amount of light. So does that mean that every time I increase the f number on my camera, I am letting in half the light as the number previous? No. Most lenses today also include a number of fractional stops (just to confuse you I am certain). Different lenses may include different fractional stops, but it’s really not important at this point to go over the mathematics involved in calculating what these should be. The range of full stops is as follows:
- f/1 — you’d be very lucky indeed to have a lens that lets in this much light, and it would be very costly
- f/1.4 — many professional level prime (non-zoom) lenses start here or at f/1.2
- f/2
- f/2.8 — many pro zooms start here, and this is a good maximum aperture to look for when buying a lens
- f/4
- f/5.6
- f/8 — good middle-of-the-road aperture, sometimes used by photographers as a default setting when putting their gear down for the day, in order to have the camera ready to grab a quick shot at a moment’s notice
- f/11
- f/16 — often referred to as ‘sunny 16’, for reasons we’ll get into in another instalment
- f/22 — generally as high as the majority of DSLR lenses go
- f/32
- f/45 — if you have a lens at this value or higher, chances are you don’t need to be reading this column!
Ok, great. So now you know everything about aperture right? Nope; sorry. As we’ve discussed, the aperture setting controls your depth of field; but there’s also another consideration which affects this value: distance to subject. You see, the closer you are to the object you are shooting, the shallower (or more diminished) your depth of field becomes for the same f stop.
For example, a standard 50mm lens set at f/2.8 with my subject at 10 feet distance would yield me around 2 feet of depth of field on my Nikon D3. This would nicely isolate my subject from any background which wasn’t immediately behind them. If I moved in to 5 feet however, still at f/2.8, my depth of field would decrease to around 6 inches! This would still be ok for a nice shallow portrait; however it wouldn’t be very practical for a group shot as the people slightly to the rear would be out-of-focus.
So how the heck do you know how much depth of field you have for any given situation? Not only does it change with the f stop and distance to subject, but focal length (i.e. how many millimetres your lens is or what your zoom is set at presently), and your camera body as well! One of the additional factors related to your camera body is actually named the ‘circle of confusion’ and probably seems apt given the above.
There’s an App for That
If you’re reading this article, you obviously own an iPad. There are several apps available which can help you determine exactly the depth of field for any given situation — some are free, and some cost a buck or two. There are also paper-based charts and slide-rule type affairs that can allow you to quickly figure out what to set your aperture at to achieve a given dof (depth of field) result.
If you absolutely need to get it right, the above is invaluable. Unfortunately however, it’s not practical to fire up your iPhone or iPad every time you want to take a photograph or rummage through your camera bag to locate your ‘handy’ charts while you potentially miss a great shot. Really, the only substitute for the precise values available to you via software is experience with your gear. As you come to know your equipment, you’ll ultimately be able to intuitively ascertain what the correct aperture for a desired result should be.

At first you should err on the side of caution by stopping down a little further than you ideally might wish to (i.e. using numerically higher stops), in order that you don’t leave important elements of your subject matter out-of-focus. Gradually, as you gain familiarity with your camera and lens setups, you can play with thinner margins and be more confident about the results closely matching your intention. Really, there is no substitute for experience… practice, practice, practice.
Ok, so are we done with aperture yet? Well, by now you should have a pretty firm grasp on the fundamentals; however, we’ve yet to cover how it relates to the other 2 kings, shutter speed, and ISO.
Total Exposure
In order to get a handle on how your camera manages to produce the images that it ultimately spits out, be they good or bad, you need to understand the interrelationship between all three kings. In terms of digital photography, briefly here’s how each work:
- Aperture determines how much light falls on the sensor
- Shutter speed is responsible for how long that quantity of light is allowed to illuminate the sensor
- ISO allows you to artificially boost or attenuate the sensor signal above or below your camera’s native ISO value. You can think of it as like a volume control on your stereo; but in this case it’s boosting or cutting the signal produced by light on the sensor instead of music.
A Moment on Modes
Your camera most likely has many shooting modes available to you; but in general, there are really only 3 you should be using: Aperture Priority, Shutter Priority, and Manual Mode. Aperture Priority mode allows you to select an aperture and ISO value, and the camera will automatically determine what your shutter speed is going to be in order for you to obtain a correct exposure. Shutter Priority is exactly the same, except that you select the shutter speed and ISO, while the camera figures out what your aperture value has to be for you. Manual mode is, quite reasonably, where the photographer is responsible for manually setting each value.
Aperture Priority mode is the most commonly used given it affords you maximum creative input with minimum effort for most photographic scenarios. Shutter Priority is generally used when you are shooting fast action, such as sports or birds in flight, where you need to ensure your shutter speed is fast enough to freeze the subject within the frame… or slow enough to create motion blurring effects which you may find desirable. Manual mode is used when photographers want total control over every aspect of the shot and is very often used in flash photography — a topic for another day.
Principles in Practice
So, let’s say you made an artistic decision about shooting a portrait with a relatively shallow depth of field to isolate them from the background. As we discussed above, you know you’ll want to select a lower numbered f stop… let’s say f/4. If you were using an 85mm lens and you were around 10 feet distant from your subject, you’d have about a foot dof. Now, let’s also suppose that you’re in an environment where there isn’t much light and don’t want to use a flash, preferring the natural illumination in the scene.
Your first consideration is that you want to avoid potential camera shake which results from a shutter speed that is too low for the focal length you are shooting at — leading to blurry photos. If you were using a full-frame camera like a D3, you’d want to ensure that at 85mm, your shutter speed is above that number, let’s say at least 1/100th of a second or higher to have some margin of comfort. If on the other hand you’re using a cropped sensor camera (includes the majority of DSLRs available today), you’ll want to multiply by the crop factor associated with your unit. So if this applies to you, and your camera’s crop factor is 1.5, that value would be 127.5 and you’d be selecting a shutter speed with a comfortable margin above that, say at least 1/160th of a second.
So you’re in Aperture Priority mode and have set your unit to f/4, but given the low light conditions, the camera’s selection of shutter speed is below the acceptable threshold to minimize camera shake. What to do?
Well you have two non-flash choices: increase your aperture size (i.e. reduce your f stop number to a lower value) to let in more light, or boost the power of the signal being input to your sensor by increasing the ISO setting beyond its native value. Each choice represents a compromise you’ll have to consider.
If you increase your aperture size, you’ll reduce your depth of field which may or may not be a viable option depending on your subject matter… and even then, you may still find yourself with insufficient shutter speed.
On the other hand, just like when you crank your stereo up, distortion occurs, if you increase your ISO, you’ll introduce noise (graininess in your images) which can become dramatic as you bump it up to greater values.
As what you’re after is a correct exposure, with no camera shake and as little noise as possible, you may find yourself opting for a dual compromise which includes slightly increasing both your ISO and aperture size.
Finally
Whew! Now that you’ve a grasp on some of the foundations of photography, it’s time to get out there and do some shooting. While the above certainly may seem daunting at first as there are so many things to consider before depressing the shutter, after a while it will become second nature and you can concentrate more on composition and subject matter, without so much attention having to be paid to the fundamentals. Good luck and happy shooting!