Light is the photographer’s most valuable resource and is available to all; the ability to shape it effectively in the studio however, is what often separates the professional from the amateur. In order to confidently approach this task, one needs to understand two things: what are my lighting goals, and what are the tools at my disposal to help me achieve them?
While in Volume II, we discussed various lighting styles: short, broad, butterfly, Rembrandt, edge, etc. which help us to answer the first question; this time around we’ll address the second, and cover the characteristics of specific light modifiers.
Umbrellas
Mary Poppins may not have been an aspiring photographer (well we never asked her, but where would she find the time?), but like her, no self-respecting studio shutterbug should be without one… or several for that matter. There are two main varieties: reflective, and shoot-through, though some manufacturers offer attractive combos that feature both options. So what are they good for?
Well, first of all, when compared to similar light shaping options such as soft boxes, main advantages include portability and ease of setup. Further, for those just starting to build their studio gear collection, they are significantly less costly than their larger counterparts.
Shoot-through umbrellas are made from translucent materials which allow the photographer to fire a strobe directly through them (hence the name). This essentially provides a large diffuser, softening the harsh light that is emitted by flash and dramatically reducing unsightly shadows that would otherwise mar a photograph. The reflective variety, on the other hand, are utilized by bouncing the strobe off the inner surface and onto the subject. This inner material may be standard white, silver to achieve a cool, contrasty effect, or gold to warm the subject up.
The differences in terms of the quality of the directed light (beyond colour temperature generated by the different reflected surfaces) however, is the amount of spill (stray light not landing on your subject) and contrast provided by each. Shoot-through umbrellas offer more spill and lower contrast, meaning the shadows will be more diffused and your background will receive more light, while the reflective variety provide the opposite, with more contrast and less spill. This of course assumes equal distances between flash, modifier, and subject when comparing the two. One of the primary advantages of shoot-through however, is the ability to move the flash much closer to your subject without your rig appearing in-frame. This enables the photographer a significant degree of control over power required, spill, and the softness of the light (which can be very soft indeed the closer it is to the subject). For this reason, many photographers opt for shoot-through over their reflective counterparts; though, as always, the situation and desired result may dictate otherwise.
Soft Boxes
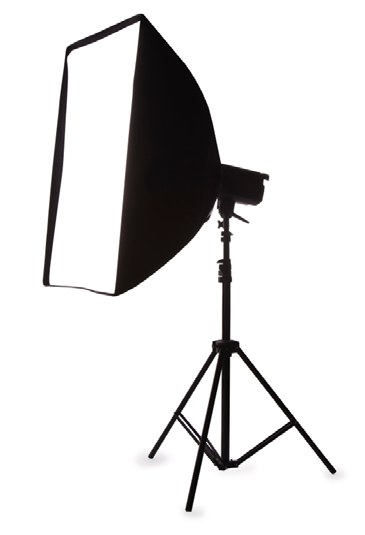
Similar to a combination of the shoot-through and reflective umbrella, soft boxes often have reflective inner surfaces (typically silver), but are designed for the strobe to shoot through inner baffles and a translucent outer fabric. The baffle’s purpose is to eliminate hot spots on the outer surface, resulting in a uniform and very directional light source that offers the photographer great control over exactly where they wish the light to fall.
Perfect for individual portraits, soft boxes, as their name suggests, render very soft illumination and are easy to position close to your subject without appearing in-frame. They require a little more practice, and are a little less forgiving than shoot-through umbrellas, as they deliver less spill and so must be positioned with more precision to get the best results. Additionally, you may not wish to use them when shooting groups larger than two people standing close together, as you’d need a very large box indeed, or be required to move your strobe back — defeating the purpose of the soft box by creating harsher light in so doing.
Three main shapes of box are available to the photographer: square, rectangular, and octagonal. Given the intent of these light modifiers is to simulate light which you might receive from a window (see Rembrandt lighting in Volume II’s Studio Secrets), rectangular and square are the most common. However, octagonal soft boxes are becoming increasingly popular due to the circular specular highlights they create in the subject’s eyes, which look great given their similarity to the shape of the sun.
While soft boxes can work well on their own, given their characteristics as outlined above, you’ll more often see them used in tandem with fill lights and other multi-strobe and reflector combinations. No studio setup is complete without them however, and you’ll be amazed at the beautiful effects you are able to achieve with a little practice and patience.
Snoots & Grids
No, snoots aren’t your well-to-do neighbours who look down their noses at your meagre holdings with disdain… ok, well maybe they are. From a photographic perspective however, snoots are conical devices which are affixed to your strobe in order to produce a focused beam of light. When you need maximum control over where your light falls, or are trying to create spotlight effects, the snoot is your friend. Note however, if you are using a snoot with a portable speedlight, you’ll want to set it for its maximum telephoto range, as there’s no sense wasting the power it would normally require in wide-angle mode, given you’re restricting the light to a tight beam.
Often used to illuminate your subject’s hair and thereby create separation from the background, these modifiers can however yield a somewhat sharp falloff, which, should this not be your desired effect, may be mitigated by the utilization of yet another device: the grid. Grids are essentially a honeycomb of tiny snoots, and can even be placed over or within a larger snoot for more defined results. A grid is very useful for tightening the beam while softening your edges and falloff. Additionally, they’re excellent for creating effects on your background, particularly when used in conjunction with coloured gels.
Gels
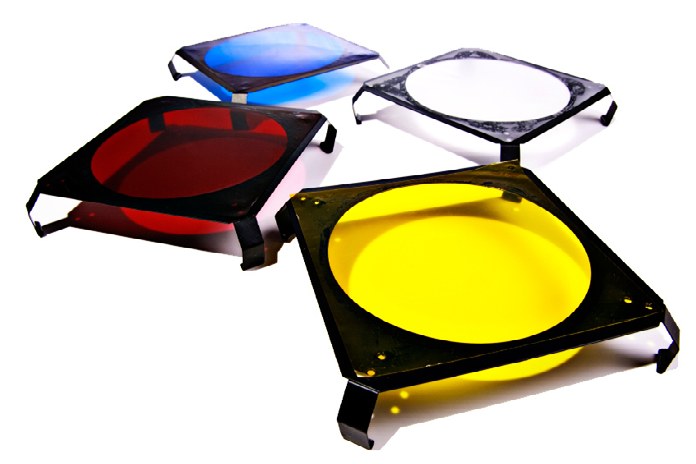
While gels can definitely be used to correct white balance in mixed lighting scenarios, and this is something you may often do when on location, most studios don’t have to deal with this issue very often (except by choice, given the uniformity of their strobes’ colour temperatures); and with the advent of digital and RAW, white balance is significantly less problematic than in the old days of film capture.
As the full range of what you can do with gels is beyond the scope of this article, we’ll get started by providing some basic tips on how best to approach their utilization. As mentioned above, gels are great to use for creating coloured effects on your background. There are a few things to keep in mind when doing this however: for example, try to use colours that are drawn from, or are complimentary to your subject. You may want a bright red gel to illuminate a background and accentuate a similarly coloured lipstick your model may be wearing. Just be cognizant of the colours in the scene, and select your gel accordingly. Also, you’ll often want to flag (partially block) your background light in order to avoid it falling upon your subject. Barn doors are another modifier which are quite helpful in achieving this goal.
If you’re using gels to add some drama by directing them at your subject, be sparing. Colour is good, but too much of a good thing can lead to some pretty hideous results. Instead of using a full intensity CTO (colour temperature orange) gel on your subject, try using a 1/4 or 1/2. Balance it out with a complimentary colour for your background, say CTB (10 points if you can guess what this acronym stands for!). This combination of warm and cool can yield some excellent results, and is very frequently seen in cinema.
Finally, if you don’t have gels, you can improvise and use items you may have around the house in their stead. Try firing your strobes through translucent coloured drinking cups for instance, or stained glass, or clear bottles filled with coloured liquid… the options are only as limited as your imagination!
Summing Up
As we said at the outset, having a firm grasp of what your lighting goals are for a shot is critical to your studio success; but so is knowing what your tools are capable of, and when to employ each in support of their achievement. Experimentation and repetition will serve you well while getting to know your gear’s characteristics, strengths, and weaknesses… and hey, pixels are free, so what’s keeping you from their mastery? Nothing but time. Until next time, have fun!